Click These:

Friday, October 11, 2013

IR Receiver + LCD + LED + Arduino

Here is the groundwork for being able to take signals from any IR remote control (TV remote, VCR remote, DVD remote, SAT remote, etc)... and then after that, the idea is that you'll think of something to do with those buttons presses, and then write code that does what you want it to do...

it decodes the IR signals, and displays them on an LCD screen... as well as blinking an LED to let you know that the signal is received...

Here's a link to the Arduino code:

and the circuit itself is very simple.

just hook up the Infrared receiver component to 5v and ground, with the output signal going to digital pin 10 on the arduino.

connect the high power LED (or any other LED for that matter) to the arduino through digital pin 6, connect a 330 ohm resistor between the LED and ground.

as far as the LCD goes, just hook it up in the following sequence:
LCD RS - digital pin 12
LCD Enable - digital pin 11
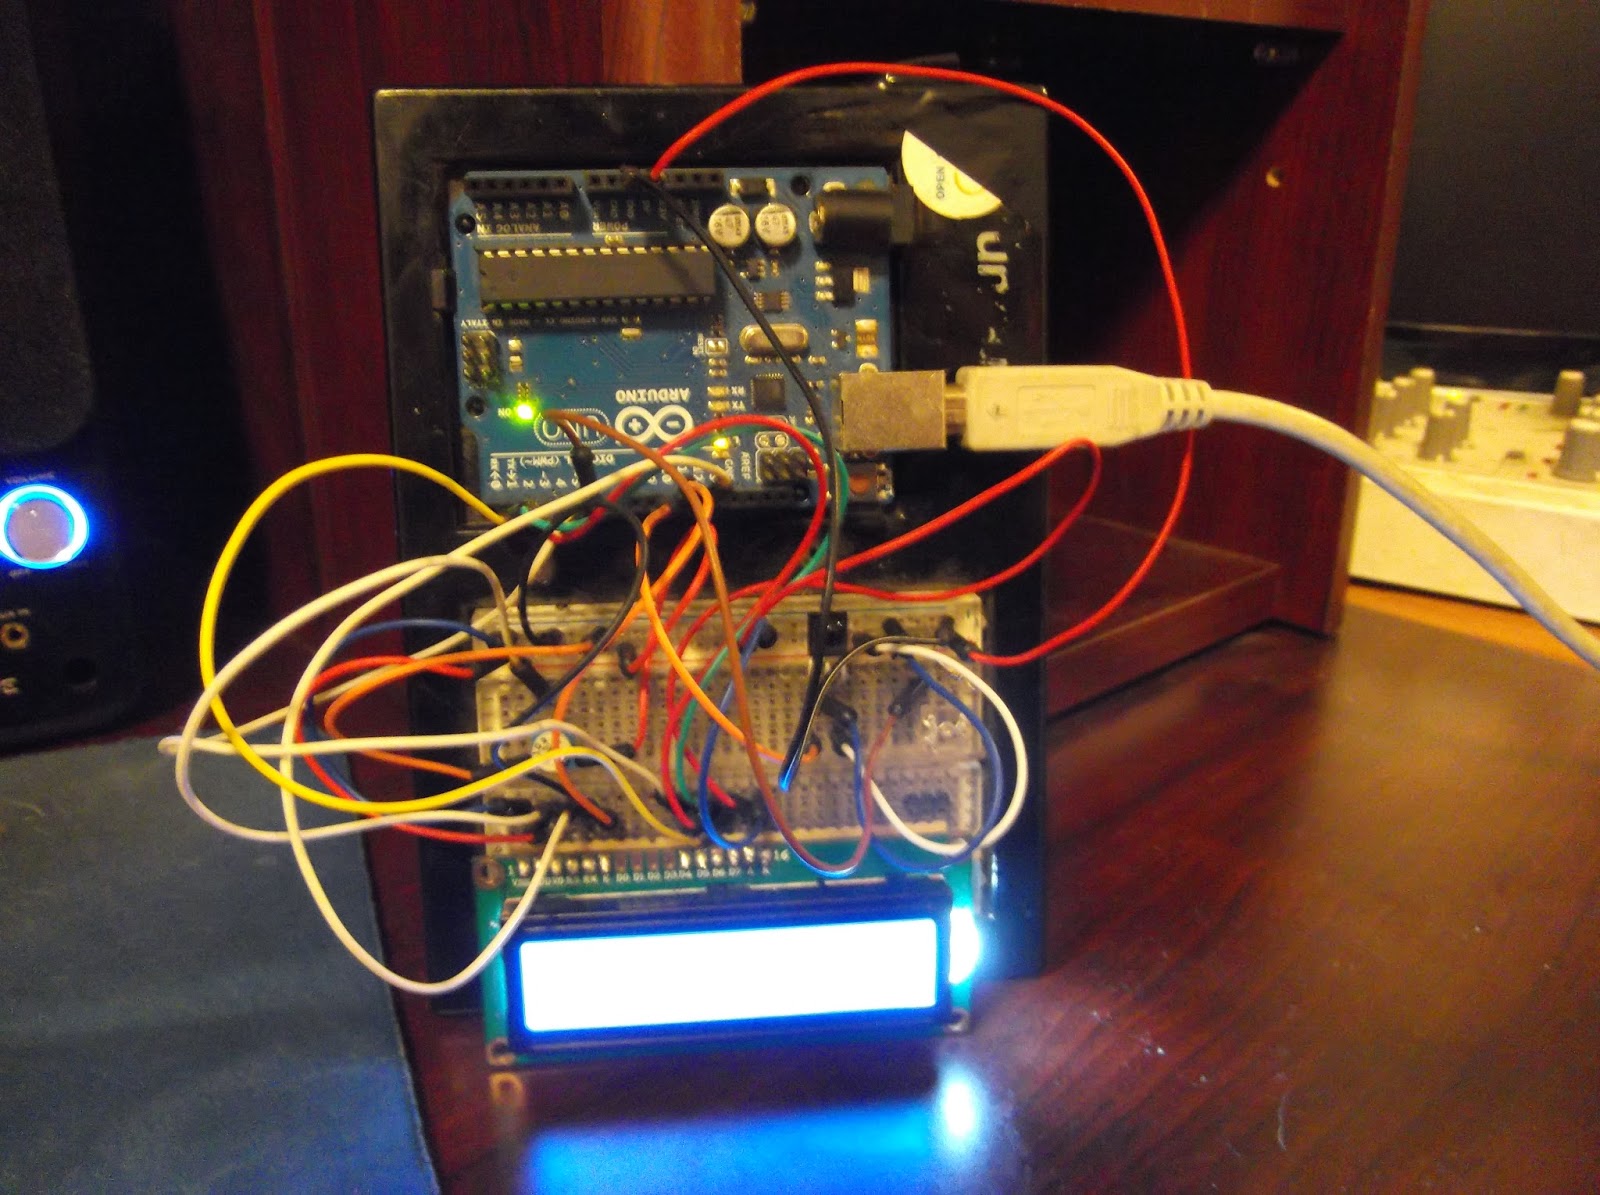
LCD D4 - digital pin 5
LCD D5 - digital pin 4
LCD D6 - digital pin 3
LCD D7 - digital pin 2
LCD R/W - ground

last but not least, take a 10k ohm potentiometer and hook up the ends to 5v and ground, and then connect the wiper (the middle pin usually) to the LCD VO pin on the LCD display... this will control the contrast of the LCD, which is actually surprisingly very sensitive and needs to be dialed in just right to be able to see anything at all on the display.

once you connect everything together, upload the code, and get it going for the first time, you'll see the letters start to appear as you slowly turn the potentiometer dial... once you find the sweet spot, just leave the dial alone and don't touch it or breath on it or anything...

at this point, you should be able to see the words 'hello, world!' and if you happen to have a tv remote or any other sort of infra red remote control, point it at the receiver and push a button... you should see the hexadecimal value of the IR code that the remote is sending... you can write this value down and use it later on when you decide to program your arduino to do your bidding at the push of a button...

there are alot of possibilities for something like this... alot of different uses for being able to control something remotely... especially an arduino... think of all the things you could do with this...

as for me, this is just another step on my way to creating an awesome midi controller...

thanks for reading. subscribe and comment please. suggestions and feedback appreciated.

Wednesday, October 24, 2012

Universal TV remote + Arduino = Wireless Midi Controller

So, i remember writing a while back about a project i wanted to do that involved turning a tv remote into a wireless midi controller, so i can control my computers audio programs from across the room during production and from across a stage during performance.

So far, i've been able to write up some code that looks for certain signals from the TV remote and then spits out midi data to my computer through a USB serial connection.

I've also made a small 'shield' that is easily installed into the arduino that has an Infrared sensor on it to detect the IR signals from the remote, and it also has a tri color LED on it, so that i can see that my button presses are being registered by the device.

the picture at the top is the receiver and LED shield that i made. The picture at the right is what it looks like when its hooked up to the arduino. basically, it is a receiver of the TV remotes signal, and it translates the signal into something the computer can work with.


If you want to use the code i've written, or enhance it in any way, feel free to do so.

to get started you will need to have an arduino ready, download the IR library written be Ken Shirriff
at this link and upload the following code to your arduino. (sorry the code is so long, i could probably make it alot more efficient by writing in some new functions)
here is a link to the arduino code for the project
You'll also need a program to translate from Serial to midi... like this one... http://spikenzielabs.com/SpikenzieLabs/Serial_MIDI.html

also, depending on which tv remote you have, you might need to reprogram in your own IR codes and make adjustments to the way the code runs depending on how your tv remote sends its signals... my tv remote would send two alternating IR signals for each button pressed... yours might work differently, meaning you'll need to make changes to the code...

after some tinkering, you should be at the point where it all works and you can sit back and enjoy your own open source, fully programmable universal tv remote midi controller...

thanks for reading. subscribe and comment please. suggestions and feedback appreciated.

Friday, October 19, 2012

The Return of Kurt At Work

Hey, i just wanted to write and let everyone know i'm planning on writing more updates to this blog of music, electronics, art, and other projects that i call "Kurt At Work"...

The reason i haven't been writing and adding to 'Kurt At Work' is because i've been working alot trying to earn a living. i guess when Kurt is LITERALLY at work, 'Kurt At Work' doesn't really get worked on that much, even though Kurt is in fact working...

long story short, i'm here... i'm still alive... and i'm still planning on doing something awesome, and then doing even more 'something awesome' after that. I'm going to document it, and write about it here. you've been warned.

that is all.

Wednesday, December 28, 2011

Computer Drawing Time Lapse Video 2

I had an idea and i just went with it... the medium is pencil and sharpies... the canvas is my computer...

Here is a new video of me adding new art to my computer.

its just a short time lapse of me adding the hindu god Shiva riding huge tsunami wave on a surfboard right into what appears to be some city that vaguely resembles San Francisco as the earth crumbles and cracks in the foreground...

the music in the video was made by my friend Lake Monster...

thanks for reading. subscribe and comment please. suggestions and feedback appreciated.
Tuesday, December 27, 2011

computer drawing time lapse video

check this out...

arduino christmas project: GIFTUINO

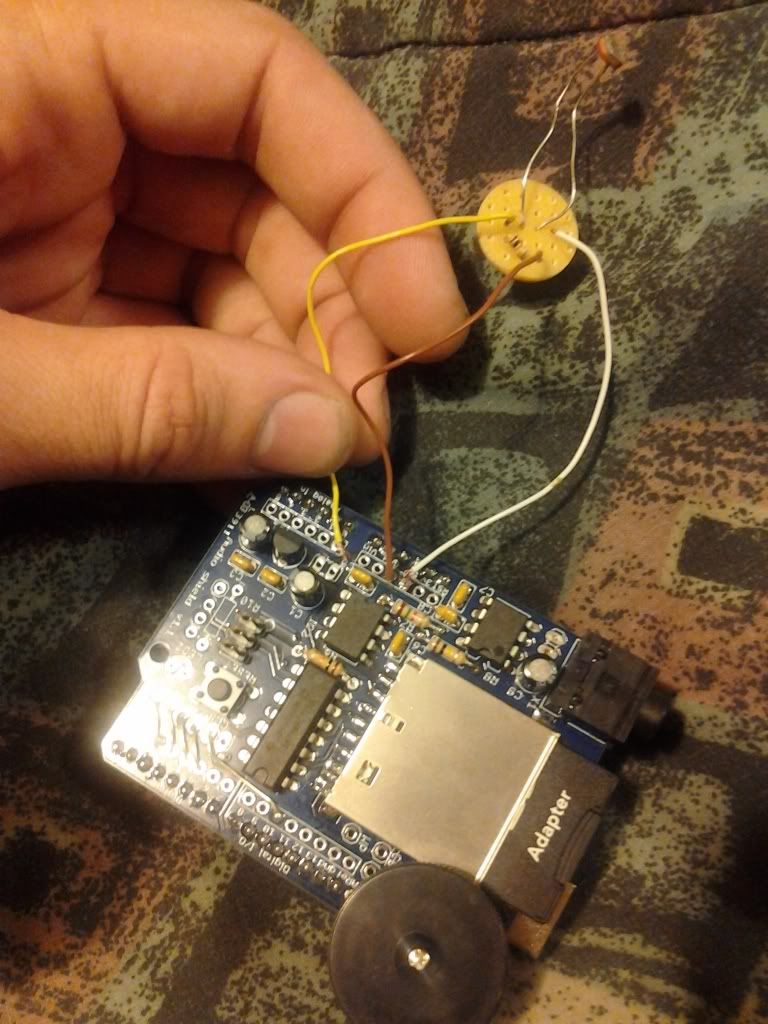
I recently made this as a christmas present for a friend. it's a gift that plays audio files when it opened. I made it with an arduino, a wav audio shield, a photoresistor, a 10k ohm resistor, some wire, solder, and a little bit of pcb.

you can pick up a wav audio shield online fairly easily... order this handy shield, solder it together and the rest of this project is super simple...

You put the audio files onto an sd card as .wav files, and then you put the sd card into the wav shield. You can either download wav files or you can create your own with your favorite digital audio workstation type program.
the arduino runs code that detects the voltage from the light sensor, and based on that reading, turns the audio on and off.

The end result: a gift that says or plays whatever you want it to when its opened, and you can stop the audio and skip to the next track by closing the gift.

Below is a simple schematic that show how to build this.
you should only need 3 wires to set up the light detection.

in the pictures above, i have a white wire going to 5 volts, the brown wire going to ground, and the yellow wire going to analog input 0.

i have drawn it as red, black, and green in the diagram to the right.

Here is the code for the arduino sketch.

once you get everything wired up, have your own audio loaded on the SD card and upload the code to your arduino, you should have a very personalized gift to give. this is perfect for holidays, birthdays, special events, jokes, pranks, and sincere messages of thanks...

there are also plenty of outputs left on the arduino for controlling lightsor any other sort of bells and whistles you'd like to add to this project...

you can see it in action in the video below...

thanks for reading. subscribe and comment please. suggestions and feedback appreciated.

Monday, December 26, 2011

new watercolors

I just got a set of watercolors for christmas. this is the first thing I've made with it. it's not quite done yet, I'm going to finish it later on.