Click These:

Tuesday, June 2, 2015

The Original Kurt At Work

I used to work as a sign shaker at a certain cell phone carrier location in northern California. The job sucked until I had music... from that point on the job was pretty awesome.

I made this video shortly after realizing how awesome my job was, mostly because I wanted people to know what I was hearing when I was doing what I did, because I assumed that most people thought my movements were just uncoordinated random flailing.

When I went to name this video, 'Kurt At Work' popped into my head, and thus the name of this blog and many other projects was also created.

Shortly after posting the video to reddit, it gained about 40,000 views within a matter of days. some people thought i got paid a bunch of money to make the video as some sort of corporate attempt at a viral video campaign... but nope. I wish that had been the case. I made it myself just for the heck of it.

thanks for reading. subscribe and comment. suggestions and feedback appreciated.


Thursday, March 26, 2015

A preview of The Grid: websites built by AI

there has been a buzz online surrounding a web development platform called 'The Grid', set for release in spring of 2015. What sets The Grid apart from every other online web design platform is that it uses artificial intelligence to create beautiful and fully functional websites.

"The Grid harnesses the power of artificial intelligence to take everything you throw at it - videos, images, text, urls and more - and automatically shape them into a custom website unique to you. As your needs grow, it evolves with you, effortlessly adapting to your needs."

-that is a claim written on The Grid's website, which is the first website to have been made using its AI web designing algorithms. The website looks beautiful. In fact it's almost hard to believe that a website could be made so quickly (within as little as 3 minutes) and end up looking that good...

I found that The Grid had open sourced their design guidelines in PDF documents... which is awesome, because i was able to gnaw on those documents for a while and get a feel for how the site might handle the content and churn out designs with them... also, by following links on that page, i was able to also find what looks like different iterations of The Grid website, each with a different look and feel, and all obviously made by The Grid. i also came across this very interesting article which explains grid style sheets and how it works in The Grid.

The CEO of The Grid, Dan Tocchini, went on Social Media Week in New York recently and gave a live preview of The Grid in action. Right away it was apparent that the interface was incredibly easy to use. By simply right clicking and selecting The Grid's custom 'Share' command you can send a web page, article, post, images and text to The Grid.


Once shared, it ends up in The Grid's user interface, which can be accessed by clicking a button in the upper right hand corner after installing the chrome add on.

This takes you to a pretty minimalist and very sleek looking UI that has a list of all the posts, images, video, etc. that you have shared or that is pending being shared.

From here you can make changes to posts, and publish them very easily and within seconds. you can choose which site to publish to, and which page to post to on that site.

Another awesome feature is the AI's ability to find the focus or subject of an image and make sure that the subject doesn't get cropped... no matter what. The Grid also extracts color palettes to use for the website design directly from the images and content that you upload.

There is a very easy to navigate settings menu, which shows where you can make adjustments to the news feed, purpose, content, navigation, and design of the website. which gives you a surprising level of control over the AI algorithms and how they work together to create your website. This is one of the things I like the best about the user interface, it makes me feel a lot better about handing over the majority of my website design over to an artificial intelligence.


All in all, besides looking like a very time efficient way of designing and maintaining a website, The Grid also just looks and feels good to use. The whole process from start to finish is very seamless making new content and keeping it flowing throughout the website.

The Grid just announced recently that they are going to start a rolling beta, and will gradually begin to let those who have signed up already to start getting to work on their sites. I've got my fingers crossed to be among the first in beta testing.

when you sign up for the grid, you are able to host seven websites using the service. I already have plans for three of those slots. I'm going to use one of them for my blog, Kurt At Work and another slot for my music label, Major Music Label and one for a nonprofit organization I'd like to support, Lucerne FLOW.

thanks for reading. subscribe and comment. suggestions and feedback appreciated.

Wednesday, December 24, 2014

Wireless Midi Controller - Prototype 2

I wrote on here a while ago about wanting to turn a tv remote into a MIDI controller using an arduino and an Infra-red receiver component...

i came up with a new idea... how about making a midi controller out of a tv remote... but making the receiver really badass looking too...

so, i decided i would create an all new version of the project...
i wanted it to have alot of lights in the receiver so that there is some visual feedback for when buttons are pressed, as well as giving an indication of the values of midi parameters...

i rigged up some digital shift registers in a daisy chain and hooked the outputs up to RGB LEDs, and installed a library written by Elco Jacobs that allows me to pulse width modulate however many outputs i need through the shift registers... so, in laymans terms, i could control however many lights i need individually, and mix any color and brightness...

you can find more info about the ShiftPWM library here

... the thought of having a really trippy looking lit up pyramid that helps me make music seemed pretty appealing to me...so i set to work on it...

at first i made the design out of a Krave cereal box... i made a basic shield for the project and starting soldering together the shift registers... i got the whole thing wired up with 2 RGB LEDs (because thats all that will fit on one shift register alone) and when i uploaded the code, the lights and the shift registers were not working right... all the lights would light up whenever just one was supposed to...

i kept going over the code again and again, looking for problems with the soldering... but just couldn't find anything wrong... eventually i decided to go without having a whole bunch of tri color LEDs, and that it would be simpler to just do 2 RGB LEDs using the arduino's 6 digital PWM outputs...

...but then i thought, what if i use the arduino mega that has been sitting on my shelf doing nothing?... it has 12 digital PWM outputs built in already, and i started finding code online for making other digital pins produce pwm...i could get up to about 54 digital pwm outputs from the mega, and maybe by using the anolog outputs too... i could get another 16...

still though, thats only 70 outputs and thats only enough to control 23 RGB LEDs at the most...

i ended up opting to go the simpler route of just doing the two RGB LEDs with the arduino uno's built in digital PWM... just to save time...

i installed this into the cardboard pyramid i had made and once i had the arduino, the IR receiver and the RGB LEDS in place, i put a cardboard stencil i had made on the outside and taped a layer of paper around it tightly, creating a white minimalist pyramid...

i started coding it to light up the way i wanted it to, and when i got it working and ready to start programming the IR signals and midi functionality, i realized that the remote i had bought was not ideal... and that if i wrote code around the current remote i would probably just have to rewrite alot of code later on...

so far its only functional as a light fixture in the corner of my room... but i have big plans for this pyramid... stay tuned to see how it turns out...

thanks for reading. subscribe and comment please. suggestions and feedback appreciated.

Saturday, May 10, 2014

Garden Watering System Using Arduino and 595 Shift Registers

hey everyone, i just wanted to write about a project i've been working on recently...

a while ago, I was inspired by the 'Garden Arduino' project i found on Make.com and Instructables.com

http://www.instructables.com/id/Garduino-Gardening-Arduino/

http://makezine.com/projects/make-18/garduino-geek-gardening/

upon reading about this project, i quickly set to building it... at first i didn't have a water pump to hook up to the circuit, so i plugged in the nearest thing i could find instead... i ended up having a plant that was controlling my lava lamp. whenever it needed water, it would kick on the lamp... i would water the plant, the lava lamp would turn off until the plant needed water again. this alone was pretty cool...

eventually i got a small water pump, enough to deliver a little trickle of water to a plant, i think i pulled it out of a small garden fountain type thing... i replaced my lava lamp with a water pump and VOILA! self watering plant.

at this point, my plant started doing pretty nicely, but family members were concerned about the high voltage electrical equipment being around water like that... (the circuit for the project requires relays that control 120 volt AC current - potentially very dangerous when mixed with water) anyway, long story short, i decided to take apart the project due to the concerns that were raised by those around me. everyone slept more soundly knowing that there was less potential for some sort of electrical fire or something caused by a water spill or a bare wire, etc...

even though i ended up taking it apart, i never put the project completely out of my mind... i thought to myself that i'd like to build that project again, except even BETTER...

i thought about how things were with that project and how i might do it differently... for instance...

-using a water pump that actually has some decent pressure...

-detecting the moisture level for the soil separately  for each plant and then be able to route water to exactly the plant that needs it...

-LCD display for showing sensor readings and other info.

-some way to interact with the garden controller after uploading, so that you can change variables manually such as watering time, minimum soil moisture level that triggers watering, how many plants are hooked up to controller, which plants are actively being watered or are suspended from watering for maintenance or other reasons, etc...

-use 9volt or 12 volt solenoids and pump so that there is much less danger of between the water and the electrical circuits.

...i put this project on the backburner for quite a while, but for the last few months i had been researching and making strategic purchases with this project in mind... acquiring some 595 shift registers for the specific purpose of expanding my digital outputs for controlling relays that would eventually be hooked up to solenoids and a water pump...

i decided to use half of the shift register outputs for controlling the relay bank (pump, solenoids), and the other half for controlling which plant soil moisture sensor is active.

so far i've gotten a better pump, some solenoids, water lines, water line connectors and adapters, duct tape, electrical wire, shift registers, analog multiplexers, LEDs, resistors, some galvanized nails, an LCD screen,  9v and 12v DC adapters, electrical tape, solder...

i'm starting to get things arranged and things are finally coming together really nicely. in my next post i'll write up how i'm building it, show some schematics and the code i wrote to get it all working, and offer ideas for other things i might be able to add to it, or other ways to enhance it.

thanks for reading. subscribe and comment please. suggestions and feedback appreciated.

Friday, October 11, 2013

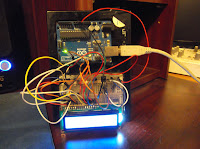
IR Receiver + LCD + LED + Arduino

Here is the groundwork for being able to take signals from any IR remote control (TV remote, VCR remote, DVD remote, SAT remote, etc)... and then after that, the idea is that you'll think of something to do with those buttons presses, and then write code that does what you want it to do...

it decodes the IR signals, and displays them on an LCD screen... as well as blinking an LED to let you know that the signal is received...

Here's a link to the Arduino code:

and the circuit itself is very simple.

just hook up the Infrared receiver component to 5v and ground, with the output signal going to digital pin 10 on the arduino.

connect the high power LED (or any other LED for that matter) to the arduino through digital pin 6, connect a 330 ohm resistor between the LED and ground.

as far as the LCD goes, just hook it up in the following sequence:
LCD RS - digital pin 12
LCD Enable - digital pin 11
LCD D4 - digital pin 5
LCD D5 - digital pin 4
LCD D6 - digital pin 3
LCD D7 - digital pin 2
LCD R/W - ground

last but not least, take a 10k ohm potentiometer and hook up the ends to 5v and ground, and then connect the wiper (the middle pin usually) to the LCD VO pin on the LCD display... this will control the contrast of the LCD, which is actually surprisingly very sensitive and needs to be dialed in just right to be able to see anything at all on the display.

once you connect everything together, upload the code, and get it going for the first time, you'll see the letters start to appear as you slowly turn the potentiometer dial... once you find the sweet spot, just leave the dial alone and don't touch it or breath on it or anything...

at this point, you should be able to see the words 'hello, world!' and if you happen to have a tv remote or any other sort of infra red remote control, point it at the receiver and push a button... you should see the hexadecimal value of the IR code that the remote is sending... you can write this value down and use it later on when you decide to program your arduino to do your bidding at the push of a button...

there are alot of possibilities for something like this... alot of different uses for being able to control something remotely... especially an arduino... think of all the things you could do with this...

as for me, this is just another step on my way to creating an awesome midi controller...

thanks for reading. subscribe and comment please. suggestions and feedback appreciated.

Wednesday, October 24, 2012

Universal TV remote + Arduino = Wireless Midi Controller

So, i remember writing a while back about a project i wanted to do that involved turning a tv remote into a wireless midi controller, so i can control my computers audio programs from across the room during production and from across a stage during performance.

So far, i've been able to write up some code that looks for certain signals from the TV remote and then spits out midi data to my computer through a USB serial connection.

I've also made a small 'shield' that is easily installed into the arduino that has an Infrared sensor on it to detect the IR signals from the remote, and it also has a tri color LED on it, so that i can see that my button presses are being registered by the device.

the picture at the top is the receiver and LED shield that i made. The picture at the right is what it looks like when its hooked up to the arduino. basically, it is a receiver of the TV remotes signal, and it translates the signal into something the computer can work with.


If you want to use the code i've written, or enhance it in any way, feel free to do so.

to get started you will need to have an arduino ready, download the IR library written be Ken Shirriff
at this link and upload the following code to your arduino. (sorry the code is so long, i could probably make it alot more efficient by writing in some new functions)
here is a link to the arduino code for the project
You'll also need a program to translate from Serial to midi... like this one... http://spikenzielabs.com/SpikenzieLabs/Serial_MIDI.html

also, depending on which tv remote you have, you might need to reprogram in your own IR codes and make adjustments to the way the code runs depending on how your tv remote sends its signals... my tv remote would send two alternating IR signals for each button pressed... yours might work differently, meaning you'll need to make changes to the code...

after some tinkering, you should be at the point where it all works and you can sit back and enjoy your own open source, fully programmable universal tv remote midi controller...

thanks for reading. subscribe and comment please. suggestions and feedback appreciated.

Friday, October 19, 2012

The Return of Kurt At Work

Hey, i just wanted to write and let everyone know i'm planning on writing more updates to this blog of music, electronics, art, and other projects that i call "Kurt At Work"...

The reason i haven't been writing and adding to 'Kurt At Work' is because i've been working alot trying to earn a living. i guess when Kurt is LITERALLY at work, 'Kurt At Work' doesn't really get worked on that much, even though Kurt is in fact working...

long story short, i'm here... i'm still alive... and i'm still planning on doing something awesome, and then doing even more 'something awesome' after that. I'm going to document it, and write about it here. you've been warned.

that is all.